Dear readers, welcome to my first official baking column in the Star Tribune! I am honored to be writing here, and grateful to have you reading along. I have been writing cookbooks and baking professionally for more than 20 years, and during that time I have acquired some knowledge, tips and tricks that I would love to share with you to help with your baking, and maybe even life in general.
Straight away, I'd like to confess that most of my knowledge has come hard-earned, by making mistakes. We are living in a moment where the images of perfection are ubiquitous, and often we feel inadequate when our attempts at baking (or anything) are less than perfect. It's famously been said that comparison is the thief of joy, and I have often felt second-rate in my own baking journey.
Maybe it was hitting midlife, but reaching that sacred stage of life was a turning point in my inner monologue. All of those simple, human mistakes collectively made over the years did not spell out failure. The times I did not read through a recipe before starting, did not have ingredients at room temperature, overbaked cakes, forgot to coat a Bundt pan correctly and substituted ingredients that didn't work all helped guide me in future baking projects. Those errors added up to progress, growth and experience. Yes, I had to go back and redo a recipe, and sometimes I made the same mistake several times, but seeing my blunders and taking time to consciously work through them brought understanding, and often a fresh way to look at a recipe — and the science and art of baking.
Over the years I have had so many readers reach out via email, my website or Instagram with baking questions and frustrations. So many people have begun conversations with something like, "I can't bake; I always mess it up." My main goal for this column is to help you with both: answer a lot of common questions, and encourage those who have given up on baking to try again. If you have been baking for a long time, some of these topics may seem simple or obvious, but I also hope to provide some uncommon guidance and insights that will be new to you.
Since we are still nestled firmly in the winter months, I wanted to start by talking about baking in the wintertime, and how that can affect your ingredients. I have lived in Minnesota, with 40-plus winters underneath my belt, and while this particular winter has been mild, typically we are buried in snow, layered in scarves and sweaters, and dreaming of green and spring. Cold weather can bring changes to both our kitchen equipment and baking ingredients, which is something I learned firsthand when I started testing recipes full time while writing cookbooks. After chatting with local bakers and readers over the years, I realized that often the elements get overlooked when we set out to bake.
The colder weather makes our kitchens chilly and drier, and even with the thermostat set at room temperature (70 degrees), rooms can still fluctuate quite a bit, especially in older homes. While our furnaces may be running overtime to keep our homes at an ideal range, there are many nooks and crannies that end up cold, regardless. Currently, I have several cupboards along an exterior wall that are FREEZING when I open them to pull out ingredients and mixing bowls. This, in turn, makes the ingredients I put into them below room temperature.
What ingredients are affected most by cold kitchens?
Butter and eggs have the most to lose in a recipe by being too cool. Often those two ingredients will be called for "at room temperature" and we are used to taking them out of the refrigerator before baking to let them soften and warm up. I have found that bakers often forget to factor in that when their kitchen is extra cool, this will take much longer to do. Then, once the butter and eggs are at the correct temperature, they might be thrown into a cold mixing bowl, which chills them up again. Butter that's too cold can cause the creaming process to take longer than normal, or can prevent the butter and sugar from creaming properly. When eggs are too cold, they will not emulsify properly, causing the dough to chunk up.
On the flip side, dry ingredients may be stored in a space that is warmer than usual (due to a furnace running all winter), for instance, in a cupboard near a heat vent, and this can also cause problems. Flour especially needs to be treated carefully: dry heat can cause it to lose some essential humidity and dry out, and this will affect its role in the recipe.
What are some helpful tips for making sure our ingredients and equipment are ready for baking?
Reading through the recipe before you begin and making sure your ingredients are the right temperature is a good place to start. Butter and eggs can sit out until they arrive at room temperature, but if you need to speed things up, you can put the eggs in a bowl of warm water until they are the room temperature. I will microwave butter in a pinch to soften it — but please note this can be tricky! I heat my butter stick(s) on low for 10 seconds, then stop and turn them. I repeat this until they are just softened, checking after each turn.
Store flour in an airtight container. Flour retains moisture, so having it in an airtight container helps in both the winter and summer months and keeps it fresh longer.
Mixing bowls can be gently heated; I set mine near the oven while it is preheating, checking until it no longer feels cold to the touch. (But remember we don't want it to be hot, either.)
Making sure your oven is preheated before baking is also vital. Because ovens are metal, they can take longer to heat up properly in the winter. Using an oven thermometer to check the internal temperature is helpful (many home ovens are not properly calibrated), and it will help you assess when your oven is at the correct temperature .
After all that talk about cold weather, I've included a recipe for a Lemon Snacking Cake to help cheer us all up (although maybe hitting 70 degrees last weekend already did that). This cake is bright and delicious, and a great way to test all these tips.

Lemon Snacking Cake
Makes 1 (8-inch) cake, or 12 to 16 servings.
This lemon cake is adapted from the lemon bread in my cookbook, "100 Morning Treats." I have tweaked it a bit to bake up beautifully in snacking cake form. This cake is both dense and fluffy, and tastes best the day after baking. I like to wrap it in plastic after it has cooled and the glaze has set, and then refrigerate it overnight. I eat it cold, but room temperature is also delicious. A 9-inch square baking pan can also be used here, but the cake will bake up thinner, and you will need to check the cake sooner to see if it's done. From Sarah Kieffer.
For the cake:
• 1 3/4 c. (250 g) all-purpose flour
• 1/2 tsp. salt
• 1 tsp. baking powder
• 1/4 tsp. baking soda
• 1 1/2 c. (300 g) granulated sugar
• 1 tbsp. lemon zest
• 3 oz. (85 g) cream cheese, at room temperature
• 1/2 c. (112 g) vegetable or canola oil
• 3 large eggs, at room temperature
• 1/2 tsp. pure vanilla extract
• 1/4 c. (60 g) fresh lemon juice
For the glaze:
• 2 to 4 tbsp. fresh lemon juice
• 2 tbsp. unsalted butter, melted
• Pinch salt
• 1 1/2 c. (180 g) powdered sugar
Directions
For the cake: Position an oven rack to the middle of the oven and preheat the oven to 350 degrees. Grease an 8- by 8-inch square baking pan and line with a parchment sling.
In a small bowl, whisk together the flour, salt, baking powder and baking soda. In a medium bowl, combine the sugar and lemon zest and use your fingers to rub the zest into the sugar until evenly distributed and fragrant.
In the bowl of a stand mixer fitted with a paddle, beat the cream cheese on low speed until smooth. Add the granulated sugar and zest to the bowl and beat until combined and fluffy, 2 to 3 minutes. Scrape down the sides of the bowl, and, with the mixer still on low, add the oil and beat until combined. Add the eggs, one at a time, mixing for about 30 seconds after each addition and scraping down the bottom and sides of the bowl. Add the vanilla and mix until combined. On low speed, add half of the flour mixture, followed by the lemon juice, and then the remaining flour mixture, beating after each addition until just combined. Remove the bowl from the mixer and give the batter a few more turns with a spatula to make sure the ingredients have been incorporated. Pour the batter into the prepared baking pan.
Bake the cake until a wooden skewer or toothpick inserted into the center comes out clean, 32 to 45 minutes. Move the pan to a wire rack and let the cake cool in the pan. While the cake is cooling, make the glaze.
For the glaze: In a medium bowl, whisk together 2 tablespoons of the lemon juice, melted butter and pinch of salt until smooth. Add the powdered sugar and mix together, then whisk until smooth and no lumps remain. Add more lemon juice, 1 tablespoon a time, to thin the icing to your preferred consistency; the icing should be thick but pourable. When the cake is just warm to the touch, pour the icing over the cake in the pan and let sit until the glaze is set. Remove the cake from the pan. Slice into squares and serve. This cake is best the day after being made, and can be wrapped in plastic and refrigerated for up to 3 days.
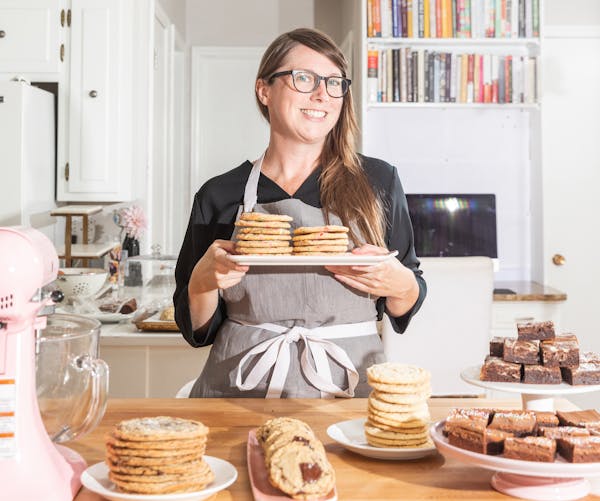
Sarah Kieffer is a Minnesota baker, cookbook author and creator of the Vanilla Bean Blog. Follow her on Instagram at @sarah_kieffer.